Developer Overview
Welcome to the GridDuck Developer Guide.
We utilise a standard RESTful HTTPS API with OAuth2 authorization to enable third parties to integrate easily and securely with the GridDuck energy management system.
GridDuck also utilises WebSockets to enable you to utilise real-time monitoring of connected assets and sites to the same extent as possible on the dashboard.
Please read our Getting Started Guide to start experimenting with the API and see some basic examples.
Before integrating your systems with GridDuck it is important to choose the appropriate OAuth2 authorization flow. To help you decide please read our Security Guide.
For a full list of HTTP Endpoints check out our HTTP Reference.
Please get in touch at support@gridduck.com if you experience any difficulties.
Getting Started Guide
Introduction
In this tutorial we will show you how to get started with the GridDuck API. We will show you how to generate a personal access token - using the client credentials grant - and show a couple of basic examples of how to use the API to manage assets.
The GridDuck API allows you to manage your assets controlled by the GridDuck cloud in a simple, programmatic way using conventional HTTP requests. The endpoints are RESTful and designed to allow you to easily view data and control your assets. Any action that you can perform through the GridDuck Dashboard - apart from organisation, permission and access token management - can be performed using the API.
Important: The client credentials grant is suitable only for machine-to-machine authentication, i.e. a fully server-side, secure and private application belonging to a single individual or organisation. For details on the other grant types, and which you should use for your specific use case, please refer to the Security Guide.
Generating Client Credentials
The first step to using the API is to create an application, which will yield a Client ID and Client Secret. The Client ID and Secret can then be used to generate an access token from which secure resources in the GridDuck API can be accessed. Applications are created using scopes which dictate what permission level the application has over your resources.
Log in to the GridDuck Dashboard
Click the Account button in the main navigation.
Click the API Integration tab button.
Click the Create New Application button.
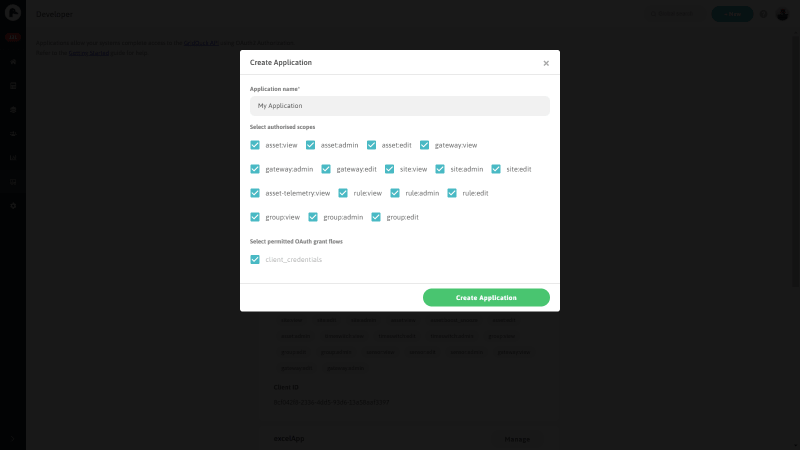
Then, on the New Application form:
Enter the application name, for example “My First Application”. This is just for your own reference.
Select the necessary scopes requires for the application to function. For this tutorial select ‘site:view’,’asset:view’ and ‘asset:boost_snooze’.
Select ‘client_credentials’ from the list of permitted grant flow types.
Click the Create Application button
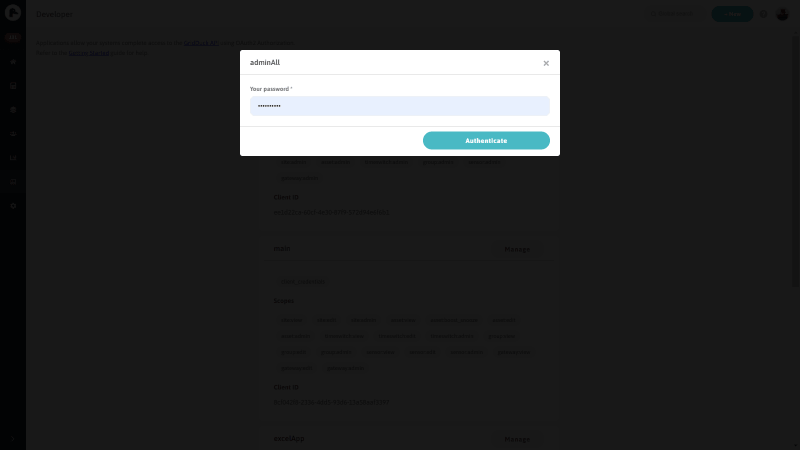
Note: Remember to keep your client secret a secret! They function similarly to passwords. Do not hardcode your client secret into programs where they may accidentally be released. If a client secret becomes compromised reset it by first clicking the View Client Secret button, then clicking the Reset Client Secret button.
Using the API
We will cover some example API requests, using the curl command. This will allow us to demonstrate various endpoints in a simple, textual format. The full API documentation is available here: GridDuck API Reference.
The first step to using the API is to request an access token which is granted in response to the correct Client ID and Client Secret.
Gaining an Access token
To gain your access token send a POST request to https://v2.api.gridduck.com/oauth/token with request data in form data format containing the fields:
grant_type: The grant type, for example “client_credentials”
 scope: The requested scopes, for example “site:read,asset:view,asset:boost_snooze”
With a Basic Authorization header containing the string ‘clientID:clientSecret’ base64 encoded.
The response contains an access token, the token type (Bearer), and in how much time it expires in seconds.
Example Request:
This example should be run in your terminal.
curl --request POST \
    --url 'https://v2.api.gridduck.com/oauth/token' \
    --header 'Authorization:Basic ---' \
    --data 'grant_type=client_credentials&scope=site%3Aview+asset%3Aview+asset%3Aedit'
Result
{
    "access_token": "---",
    "token_type": "Bearer",
    "expires_in": "---",
    "mfa_requires_setup": false,
    "refresh_token": null,
    "scope": "site:view asset:view asset:edit",
    "user": {
        "id": ---
    }
 }
Secured Requests
Our first example request will be to gather a list of assets associated with your account, using the previously acquired access token. This involves sending a GET request to:
https://v2.api.gridduck.com/asset/
With the access token sent as a Bearer header in the request.
Example Request:
This example should be run in your terminal.
curl --request GET \
    --url 'https://v2.api.gridduck.com/asset/' \
    --header 'Authorization:Bearer ---'
Result
{
  "pagination": {
    "offset": 0,
    "limit": 25,
    "total": 1
  },
  "links": {
    "next": "http://v2.api.gridduck.com/asset?offset=25&limit=25",
    "prev": null
  },
  "results": [
      {
        "children": [],
        "tp_site_id": null,
        "firmware_target": null,
        "third_party_type": null,
        "max_time_off": null,
        "serial_no": null,
        "min_time_on": null,
        "interruptible": false,
        "frequency_enabled": false,
        "frequency_off_point": null,
        "frequency_on_point": null,
        "parent_asset": "---",
        "clamp_size": null,
        "tags": null,
        "data_from": null,
        "boost_finish": 0,
        "snooze_finish": 0,
        "lost": false,
        "imp_kwh": null,
        "current_state": "ON",
        "created": "---",
        "dr_rule_id": null,
        "dr_profile_id": null,
        "user_id": "---",
        "overrides": null,
        "id": "---",
        "name": "Lamp",
        "site_name": "GridDuck Office",
        "currency": "£",
        "price_per_kwh": "14",
        "gateway_name": "Hub-369C",
        "code": "---",
        "simulated": false,
        "simulated_from": null,
        "gateway_id": "---",
        "user_state": "ALWAYS_ON",
        "timeswitch_id": null,
        "site_id": "---",
        "read_only": false,
        "sku": "PLU-UK",
        "trigger_rules": [],
        "alert_rules": [],
        "disconnected": false,
        "gateway_disconnected": false,
        "last_contacted": ---,
        "consumption": 14,
        "delivered": 515,
        "asset_signal_strength": -74,
        "site_currency": "£",
        "site_price_per_kwh": "14",
        "created_stamp": ---,
        "_permission": "admin",
        "boost_finish_stamp": 0,
        "snooze_finish_stamp": 0
      }
    ],
    "request_id": "db478882-80c9-4320-9b88-f3bc97913c70"
}
Next we might want to snooze an asset for 1 minute, or 60 seconds. We can send a PUT request to https://v2.api.gridduck.com/asset/{asset_id}, where {asset_id} is the ID of the asset you wish to edit, with the body containing JSON of the following object:
{
    "snooze_finish": 60
}
Example request:
curl --request PUT \
    --url 'https://v2.api.gridduck.com/asset/7ff88487-27b0-4234-b48f-aff17f96770e' \
    --header 'Content-Type: application/json' \
    --header 'Authorization:Bearer ---' \
    --data '{"snooze_finish": 60}'
You will receive a HTTP 204 response indicating successful snoozing.
Security Guide
The GridDuck API utilises the OAuth2 Authorization framework.
Authentication for an application which contains the credentials of a specific user/organisation is utilised by using a GridDuck issued Client ID and Client Secret. The application will have access to all resources which the authorised user has access to within the scopes dictated when the application is created. This is called the client credentials grant.
For now this is the only authorisation grant approved for third party use. In the near future the implicit and authorization code grants will be available which will allow third party applications which any user of GridDuck can utilise.
Telemetry
API
GridDuck Telemetry can be of two types; instantaneous and aggregate. Instantaneous data is continuous and retrieved as an average in a point-in-time, such as electricity demand (Watts) or temperature (°C). Aggregated data is a total accumulated measure over a time interval, such as total delivered (Watt-hours), useful for measuring the amount of energy consumed in a time period.
To access limited amounts of telemetry from your GridDuck devices use the aggregate telemetry and instantaneous telemetry endpoints in the REST API. These endpoints are restricted to 1,000 data points and 48 data points respectively. To collect larger amounts of data use the Data Download functionality.
Data Download
Data in large amounts can be downloaded using the Data Download function. This is seen on the left-hand menu on the GridDuck dashboard.
Select the devices you wish to collect the data from, the date range, granularity and the data type to collect and click Create Data Request. This process can take up to a few minutes to complete. The data is delivered in CSV format, designed to be easily read using a spreadsheet application. Multi-asset downloads are delivered as a zipped archive of CSV files.
Data Downloads can then be seen in the Data Archive tab which shows their status and parameters, and allows you to download the data in question, share or delete the data.
Data Downloads can also be created in the API via the data request endpoint. Once the request has completed processing and the status is ready the URL from which the data can be downloaded can be accessed using by creating a data request link.
Data Hooks
Data hooks to transmit telemetry as its received is currently implemented in an ad-hoc fashion depending on the requirements. Please contact support@gridduck.com to arrange implementing this.